Introduction
Transforming your home with hardwood floor covering can be one of the most rewarding home enhancement jobs. Not only does it boost the aesthetic charm of your home, however it likewise includes value. Nonetheless, achieving a specialist search in your do it yourself hardwood floor setup requires careful preparation, interest to information, and the right devices. In this thorough guide, we'll walk you with every action of the procedure while giving insights on just how to accomplish a flawless coating that measures up to that of expert installations.
Understanding Hardwood Flooring Installation
What is Wood Flooring Installation?
Hardwood flooring installation refers to the procedure of setting wooden slabs in a marked location to develop a sturdy and aesthetically attractive surface area. This can entail different strategies, consisting of nail-down, glue-down, and drifting techniques, relying on the type of wood floor covering chosen.
Types of Wood Flooring
Solid Hardwood
Solid wood floorings are made from a solitary piece of timber and usually can be found in densities ranging from 3/4 inch to 5/16 inch.
Engineered Hardwood
Engineered hardwood includes multiple layers, making it much more flexible and steady than strong wood. It's less susceptible to contorting because of modifications in humidity.
Benefits of Setting up Hardwood Floors
- Aesthetic Allure: Adds warmth and elegance. Durability: With proper care, hardwood can last for decades. Increased Home Worth: Residences with hardwood floorings have a tendency to market faster and at greater prices. Easy Upkeep: Basic cleaning techniques maintain them looking fresh.
Preparing for Your do it yourself Project
Assessing Your Space
Before diving right into your project, examine the location where you'll be installing the floor covering. Consider aspects like space size, lighting problems, existing floor types, and furniture placement.
Choosing the Right Tools
To accomplish a polished appearance throughout your wood flooring installment, collect these necessary devices:
- Tape Measure Chalk Line Mallet Flooring Nailer or Stapler Saw (Table or Round) Moisture Meter
Selecting Your Wood Flooring
When picking your wood flooring:
Consider the wood types (oak, maple, cherry). Decide on shade and coating-- darker colors might show scratches much less than lighter shades. Ensure you select high-grade boards with very little defects.
Achieving an Expert Search in Your DIY Wood Flooring Installation
Think concerning what makes professional installments stand out: accuracy cuts and seamless shifts between planks. To replicate this top quality:
Take accurate dimensions before cutting. Use a straight edge for noting cuts. Allow for proper adjustment time before installment-- this implies letting your wood sit in the area for several days.Preparing Your Subfloor for Installation
Importance of Subfloor Preparation
A well-prepared subfloor is critical for attaining an expert search in your do it yourself wood flooring installment. An unequal or improperly mounted subfloor can result in squeaks and other problems down the line.
Steps for Preparing Your Subfloor
Clean Thoroughly: Remove all particles and dust. Check Levelness: Make use of a progressing device; fill up reduced spots with leveling substance if necessary. Repair Any Damage: Take care of fractures or holes in concrete subfloors or change harmed plywood panels.Installing Underlayment
What is Underlayment?
Underlayment is an added layer put underneath wood flooring that assists with sound absorption and dampness protection.
Selecting Underlayment Material
Choose an underlayment suitable with your chosen flooring type-- alternatives include foam sheets or felt paper created especially for hardwood installations.
Laying Down Your Wood Flooring
Beginning Your Installation
Start at one edge of the space:
Lay down spacers along the wall surface to enable growth gaps. Place your first row of slabs versus these spacers.Cutting Planks Accurately
When cutting planks:
Measure two times; cut once! Use appropriate safety measures such as safety glasses and listening to protection.Creating Patterns or Designs
Consider producing patterns like herringbone or chevron for included aesthetic rate of interest-- but bear in mind that this calls for added planning!
Finishing Touches After Installation
Trimming Out Transition Areas
Use transition strips in between different floor covering types (e.g., rug to wood) or entrances to guarantee smooth transitions without trip hazards.
Removing Spacers Carefully
Once every little thing is set up and secured, get rid of spacers delicately so as not to damage edges that require touching up later.
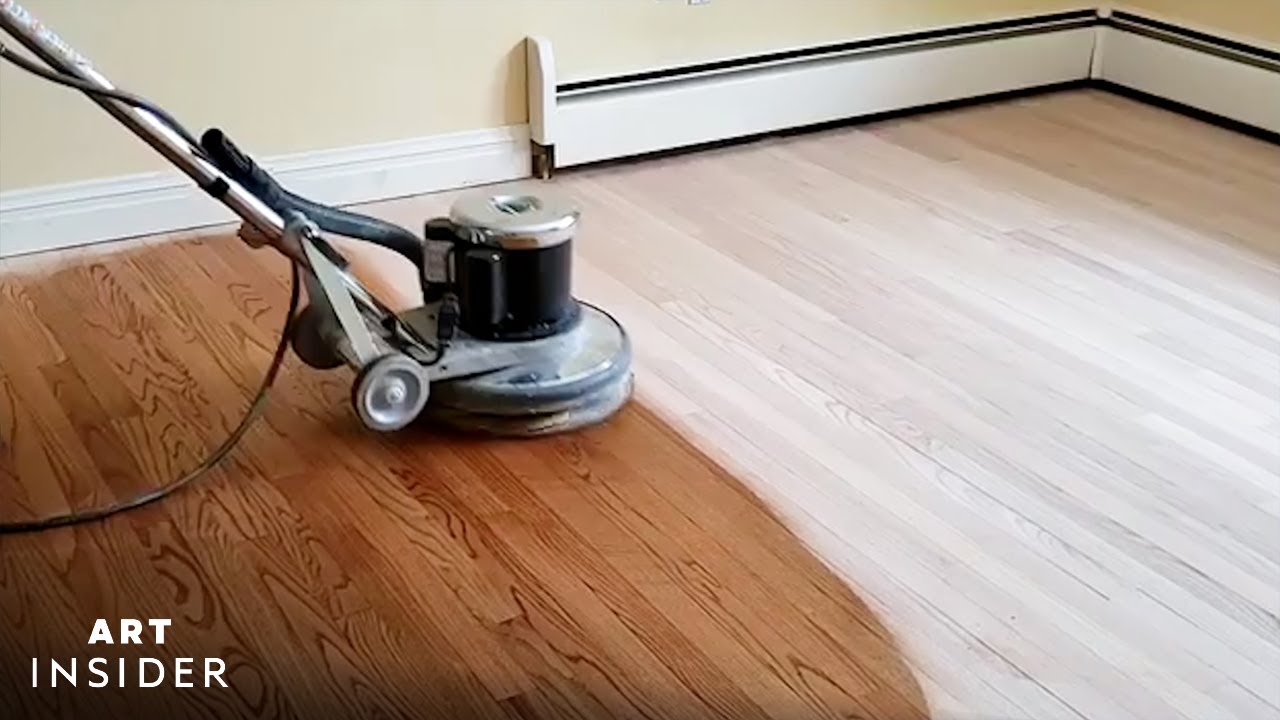
Hardwood Flooring Refinish: When Is It Necessary?
Signs You Required To Refinish
Over time even quality wood floors might reveal wear; right here's when you should consider refinishing:
Deep scratches Faded areas Water damages stainsThe Refinishing Process
Refinishing entails fining sand down the leading layer followed by using new tarnish and sealant-- this can restore your floorings dramatically!
FAQs About DIY Wood Floor Installation
1. For how long does it require to install wood floors?
Generally speaking, setup can take anywhere from someday to a number of days depending upon area size and complexity.
2. Can I mount wood over existing flooring?
While it's feasible under certain situations (like using crafted timber), it's ideal practice to remove old floor covering for optimal results.
3. Need to I work with professionals if I'm unsure?
If you're not sure concerning any type of step in this process-- from gauging properly to making certain levelness-- it might be important to consult specialists first!
4. What type of surface need to I choose?
Selecting between oil-based or water-based finishes often depends on wanted drying out time versus durability-- water-based dries faster yet oil-based often https://rentry.co/y292u5m7 tends to last longer!
5. How do I maintain my new floors?
Regular sweeping/vacuuming incorporated with occasional wiping using suggested cleaners will keep them looking great!
6. Can I redecorate my own floors?
Definitely! Simply guarantee you have all needed tools & & comply with appropriate procedures very carefully-- security first!
Conclusion
Achieving a professional search in your DIY hardwood flooring installment does not need to really feel daunting! With complete prep work, careful execution, and an eye for detail throughout each step-- from choosing products with ending up touches-- you can produce stunning outcomes that enhance both beauty & & worth within your home! So roll up those sleeves & & begin on changing those rooms right into something really special today!